

Requirements
A model is eligible for upload if it meets these requirements:- Source: Your local machine, Hugging Face Hub, or an S3 presigned URL.
- Architecture: A fine-tuned variant of a base model that Together AI supports for dedicated inference. See Available models for the list of supported models.
- Type: Text generation model.
from_pretrained. A valid model directory contains files like:
S3 archive requirements
If you’re uploading from S3, you must package the files in a single archive (.zip or .tar.gz) with the model files at the root of the archive. Don’t nest them inside an extra top-level directory.
Correct: The files are at the root of the archive.
Shell
Create the model
Create the model record in your project before you upload its weights. Creating the record first gives you a model ID for the upload to attach its weights to. Every uploaded model must reference a supported base model viabaseModelId. An upload can’t introduce a new base architecture.
Give the model a readable name (for example gemma-4-31b-it), rather than a Hugging Face repo ID.
The base model is referenced by its baseModelId (ml_...). List the supported models with tg beta models public --product dedicated and copy the baseModelId of the architecture your fine-tune derives from (for example ml_CbJNwQC2ZqCU2iFT3mrCh), or pass a deployment profile’s exact modelName (for example Qwen/Qwen3.5-9B-FP8). Don’t use the architecture id, which starts with arch_:
CLI
Uploaded models are Private by default, visible only in the project that owns them. Internal visibility makes a model discoverable from every project in your organization. On the Models page, Internal models from other projects appear under My models alongside the selected project’s own models. Use the Visibility filter (Internal or Private) to narrow the list. Checking both options matches either scope.
id (for example ml_abc123). You pass this value to the upload command in the next step. Whether a record holds full weights or a LoRA adapter is fixed when you create it: create defaults --type to model, so a full model needs no type flag. To register a LoRA adapter instead, pass --type adapter on create, as described in Upload a LoRA adapter.
Create request fields
Upload the model
After creating the model record, upload its weights. Use a local upload when the files are on your machine, or a remote upload to stream them from Hugging Face or a presigned S3 URL. Pass the modelid you saved in the previous step.
Upload from your machine
Point the CLI at your local model directory. The CLI handles the multipart upload for you:CLI
Upload from Hugging Face or S3
A remote upload streams the weights server-side, so you don’t download them locally first. Pass the source URL as--from (use --token for gated or private Hugging Face repos). For S3, pass the presigned archive URL as --from (no token needed):
CLI
id, modelId, and status at the top level:
id. You use it to poll for upload status.
Upload from the console
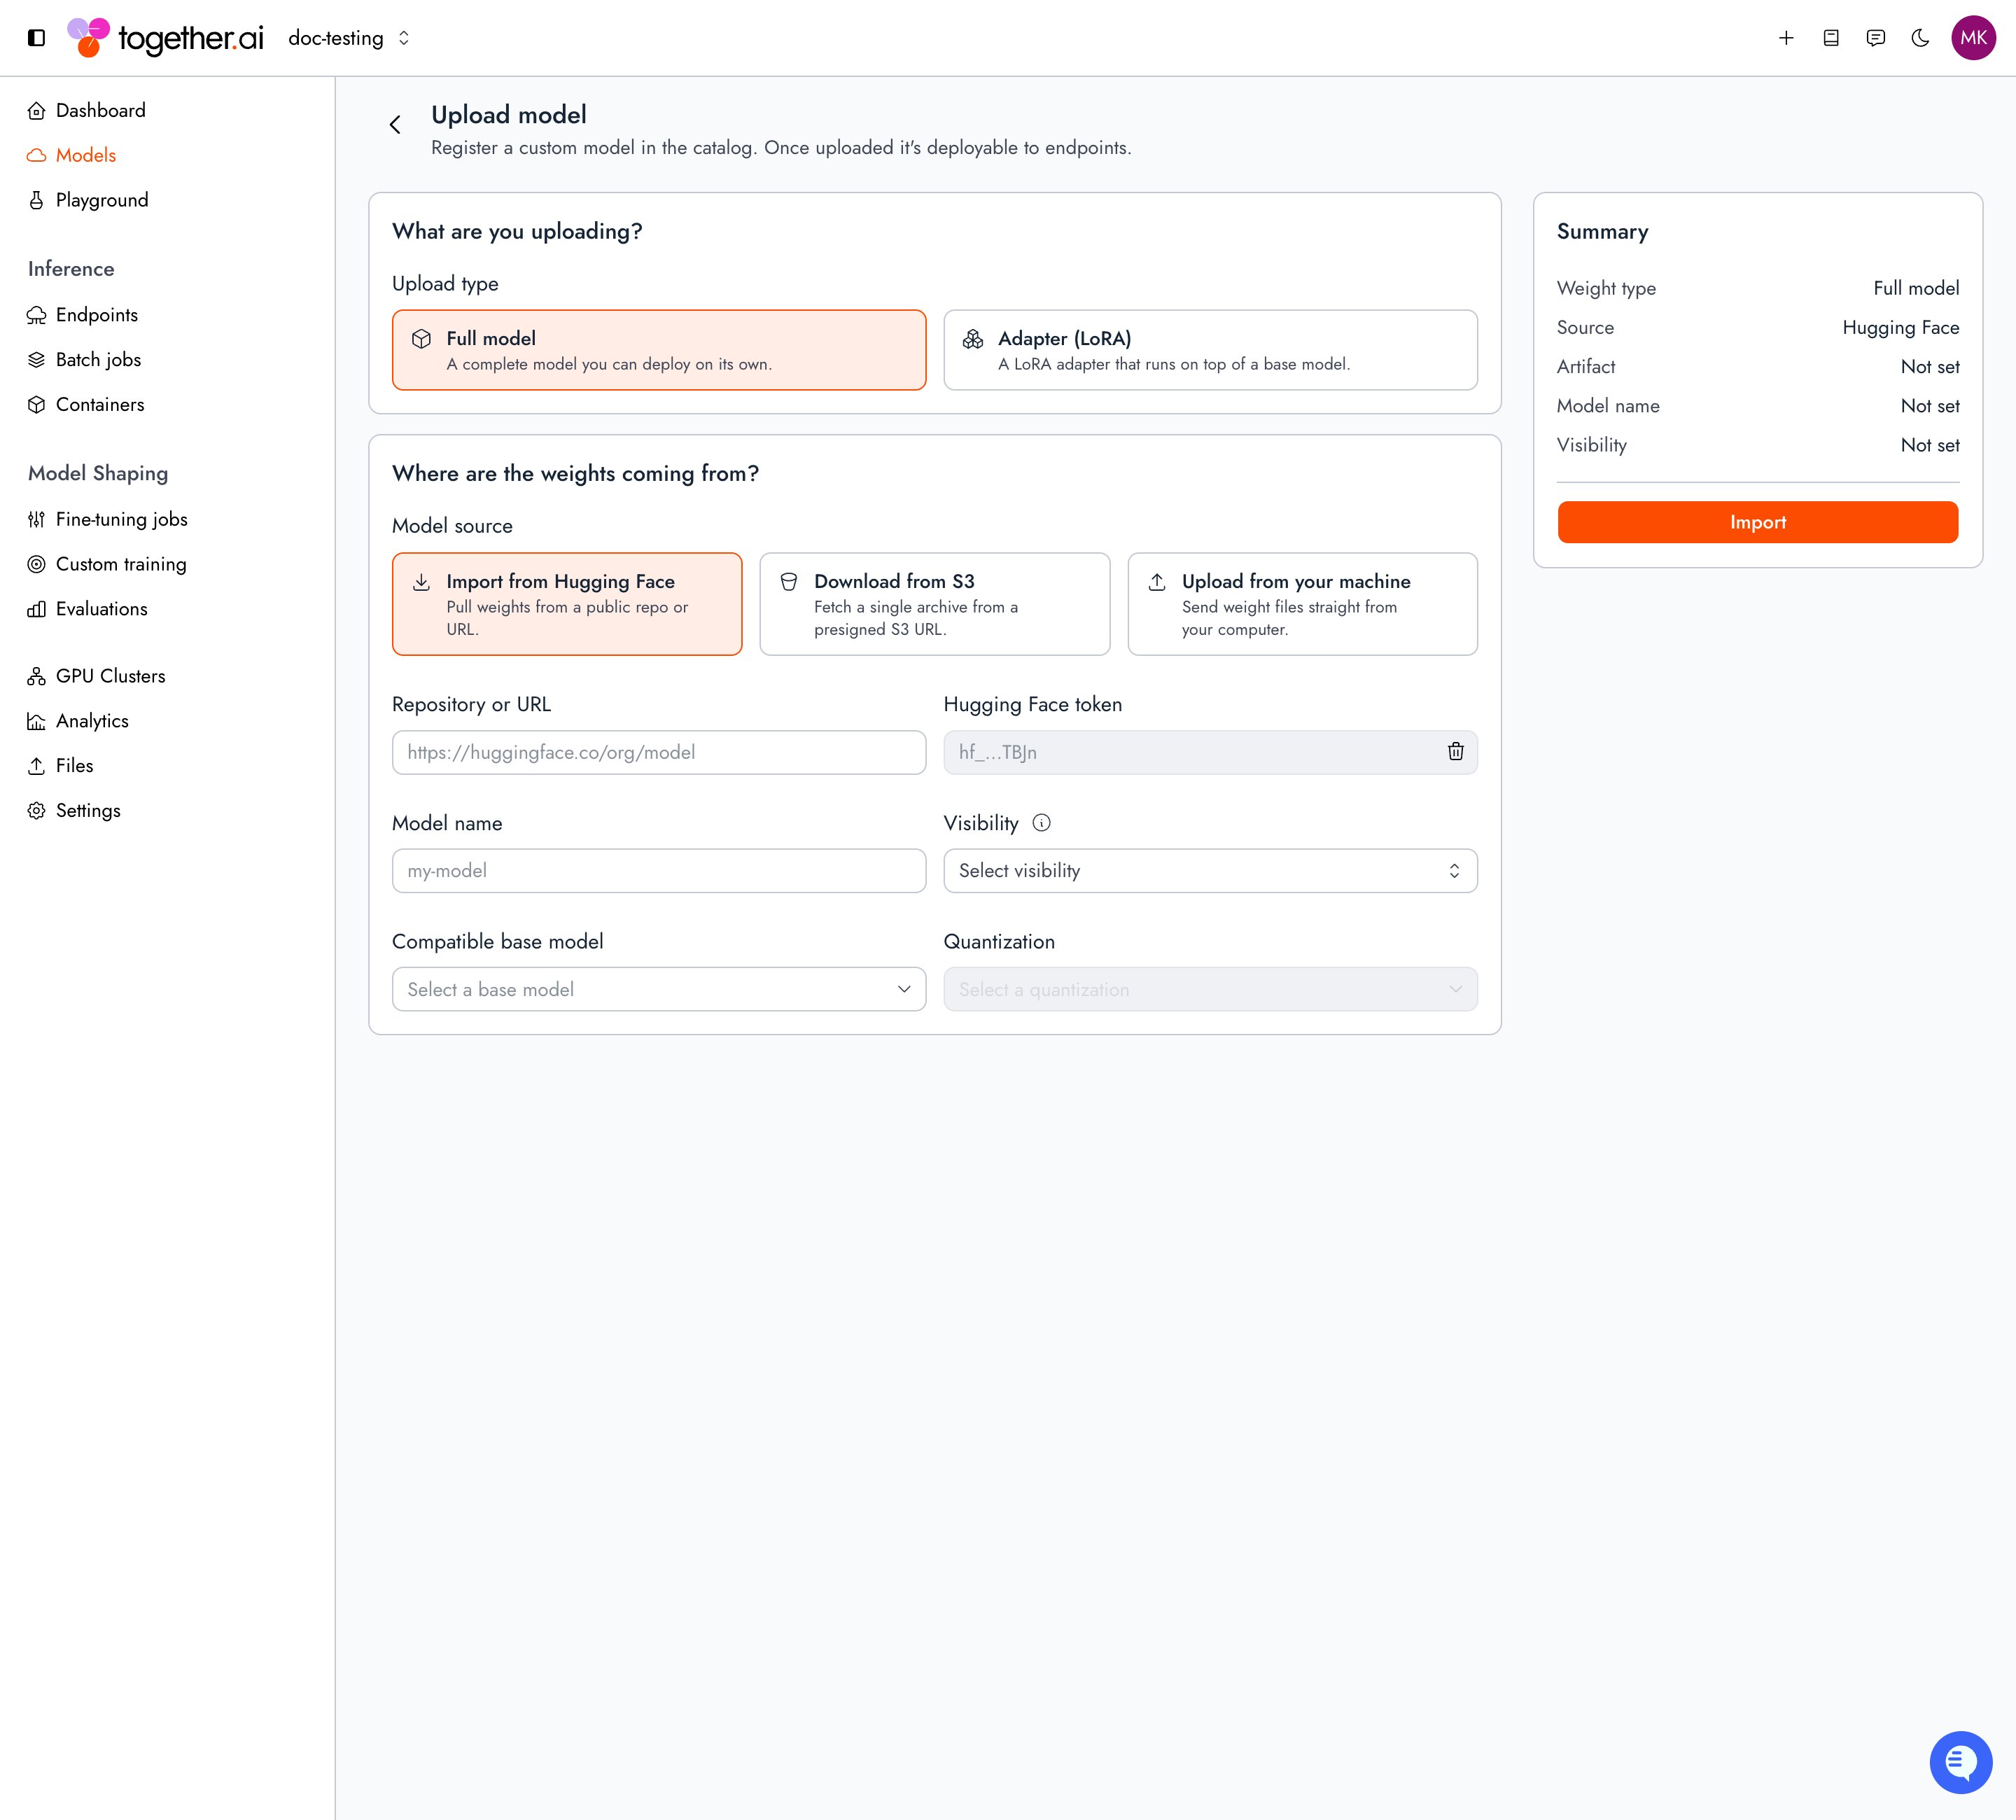
The console combines creating the model record and uploading its weights into a single form.1
Set the upload type
Leave Upload type set to Full model.
2
Choose the source
Under Model source, select Import from Hugging Face and enter the repo path or URL (add a Hugging Face token for gated or private repos), or select Download from S3 and paste a presigned archive URL. Upload from your machine shows a CLI command instead: the browser can’t upload local weights, so use
tg beta models upload for files on your machine.3
Name and configure the model
Enter a Model name, choose a Visibility, and complete the Compatible base model and Quantization fields.
4
Import
Select Import. The upload runs server-side, with progress shown below the form. You can leave the form: the model appears under My models with an Uploading badge while the job is pending or running.
Check upload status
Poll the remote-upload job untilstatus is REMOTE_UPLOAD_STATUS_SUCCEEDED. The model is ready to deploy at that point.
CLI
REMOTE_UPLOAD_STATUS_SUCCEEDED, confirm the files landed:
CLI
Check revision validation
After files land, Together validates the revision’s weights automatically. Validation checks that the weights are in safetensors format and that the config and architecture are compatible with the base model. A revision must reachREVISION_VALIDATION_STATUS_SUCCESS before you can deploy it when you pin that revision explicitly.
List revisions for a model:
CLI
$PROJECT_ID with your project ID (proj_...):
Shell
Revision validation fields
validationStatus values
When validation fails, each entry in
validationErrors includes rule, severity, and message describing what went wrong. Common causes include missing safetensors files, an invalid config.json, or weights that don’t match the declared base model.
Only safetensors format is supported. Models with only
.bin or .pt files fail validation.Deploy the model
Once the upload completes, your model has an ID (ml_...) in your project. Deploy it the same way as a base model. First, find its ID by listing the models in your project:
CLI
deploy command creates the endpoint, attaches a deployment bound to your uploaded model and a config, and routes all traffic to it in one step:
CLI
Troubleshooting
“Model not found” during upload: Create the model record first withtg beta models create, and pass the returned id to the upload command.
base_model_id is required on create: Every uploaded model must reference a supported base model. List supported models and set --base-model to the matching baseModelId (ml_...), not the architecture id (arch_...).
tokenizer.chat_template is not set during chat inference: The uploaded tokenizer doesn’t define a chat template. Add a compatible chat_template to tokenizer_config.json before uploading, or use the text completions API with the prompt format expected by the model.
Model delete fails with the model is referenced by a live deployment (HTTP 400): A deployment still references this model. Stop the deployment, wait for DEPLOYMENT_STATE_STOPPED, delete the deployment, then delete the model with tg beta models delete <model_id>.
Revision validation failed or still pending: Check validationStatus on the revision with Check revision validation. Wait for REVISION_VALIDATION_STATUS_SUCCESS before you deploy a pinned revision.